One of the most significant advantages of using Lottie is its easy implementation with web builders. In this tutorial, we provide step-by-step instructions on how to use Lottie animations with Bricks, the popular WordPress theme.
Currently, Bricks isn’t compatible with Lottie ‘out-of-the-box,’ so you’ll have to adjust your WordPress environment before adding JSON animations. But don’t worry; we’ll walk you through every step of the process!
Sourcing your Lottie
First, we need a premium Lottie animation.
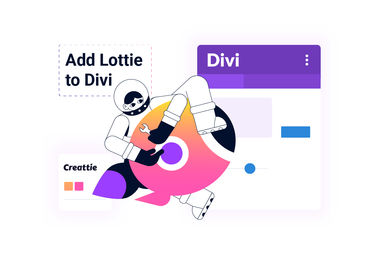
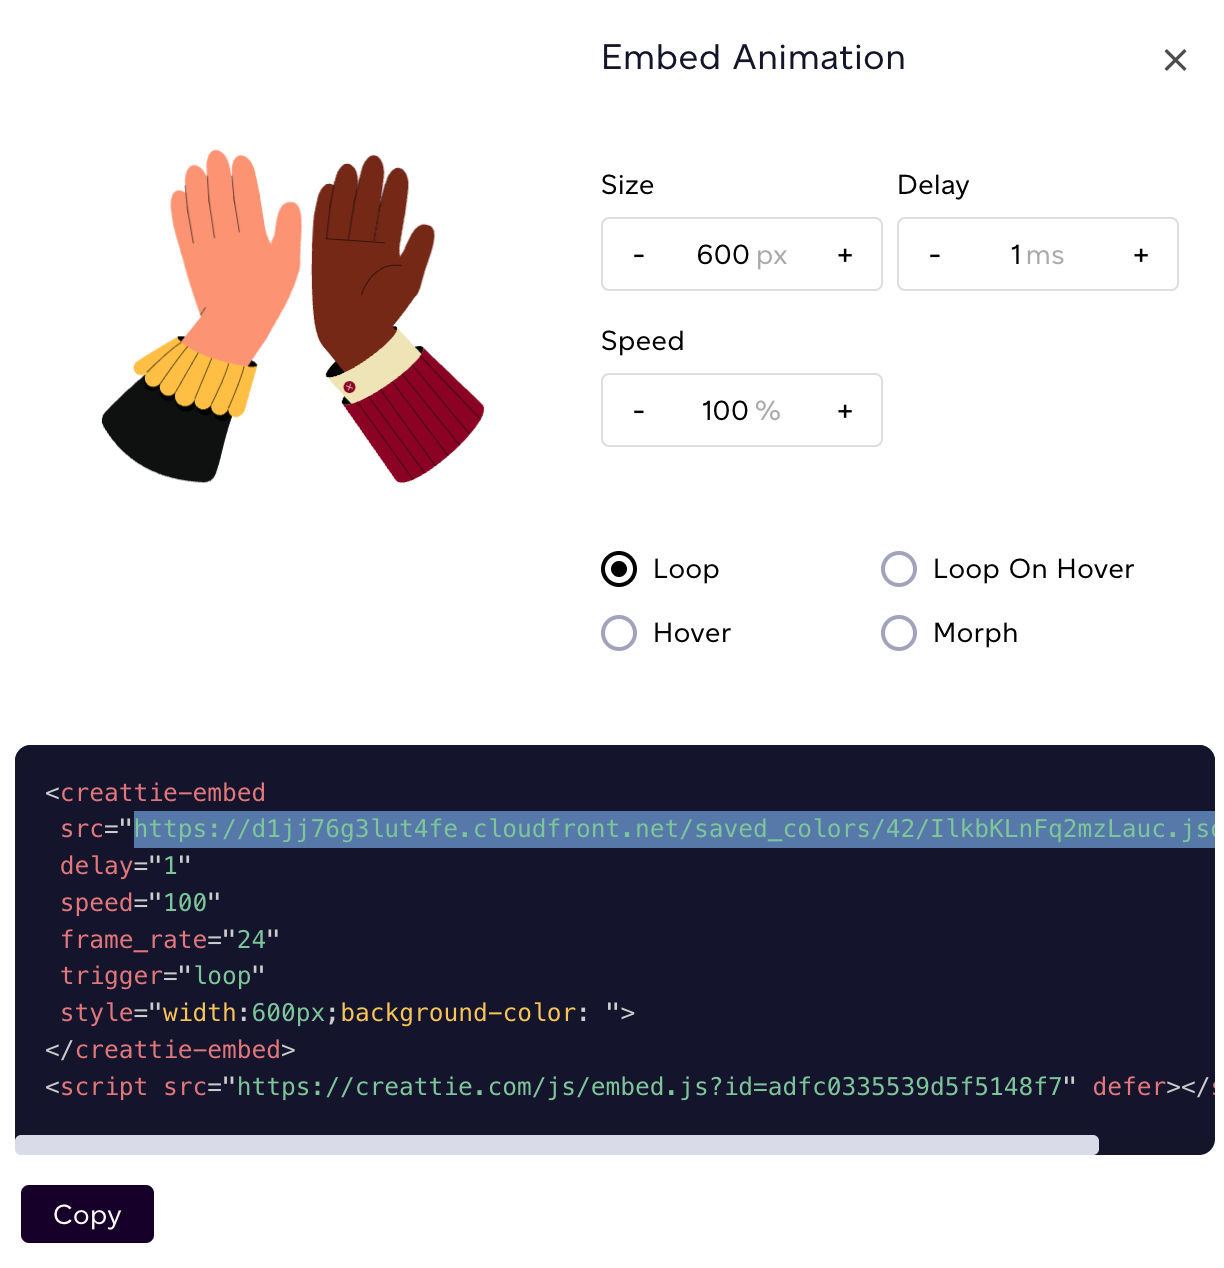
Head over to Creattie. Choose your animation. Make customizations. And finally, click DOWNLOAD.
For this tutorial, we’re working with the JSON file and SRC link. Both are easily accessed on all of Creattie’s asset pages. Click the EMBED button once you’ve downloaded the file to view the code snippet, which includes the link.
Uploading JSON Files to WordPress
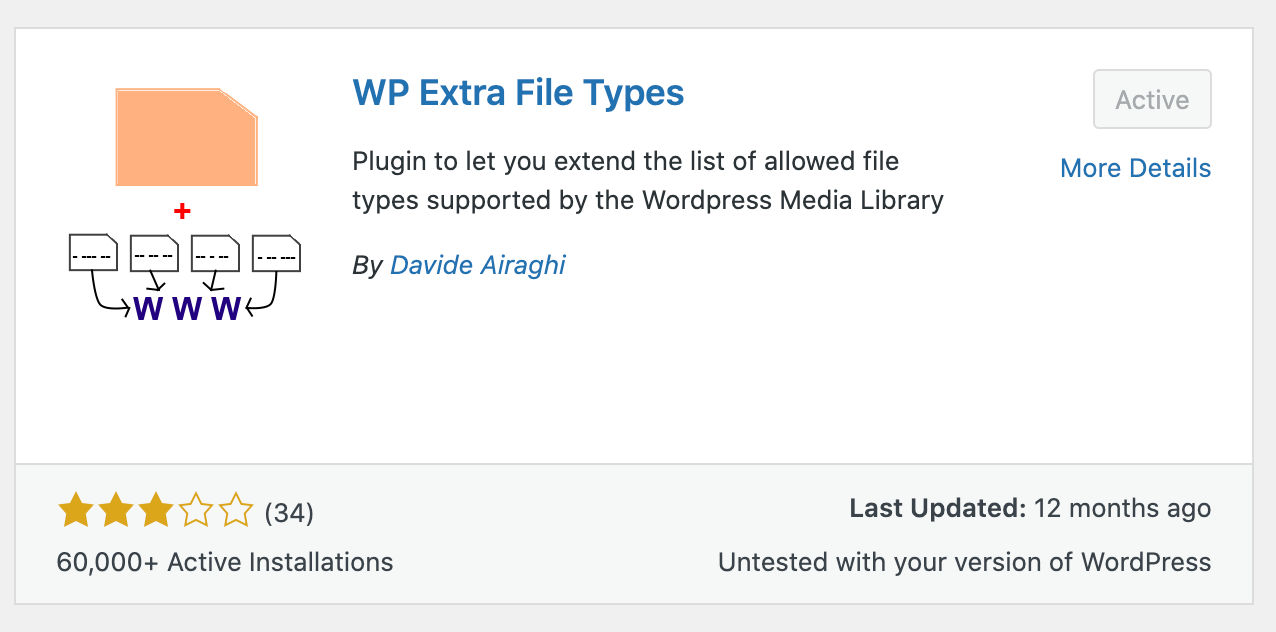
To successfully use Bricks with a Lottie file, we need to make some changes to our WordPress. WP blocks JSON files by default, so we need to make a quick adjustment to upload JSON files to our media library.
There are a few ways of going about this; however, the easiest is with the WP Extra File Types plugin. Other methods involve editing the code in your theme or PHP to allow JSON file uploads. We recommend the free plugin if you aren’t comfortable with adding code to your WP site.
If you skip this step, you can use Lottie with Bricks only with the SRC link.
First, search for the plugin.
Click DOWNLOAD, the ACTIVATE.
Once the plugin is activated, hover your mouse over Settings in the left-hand toolbar in the WP Dashboard. Then click “Extra File Types.”

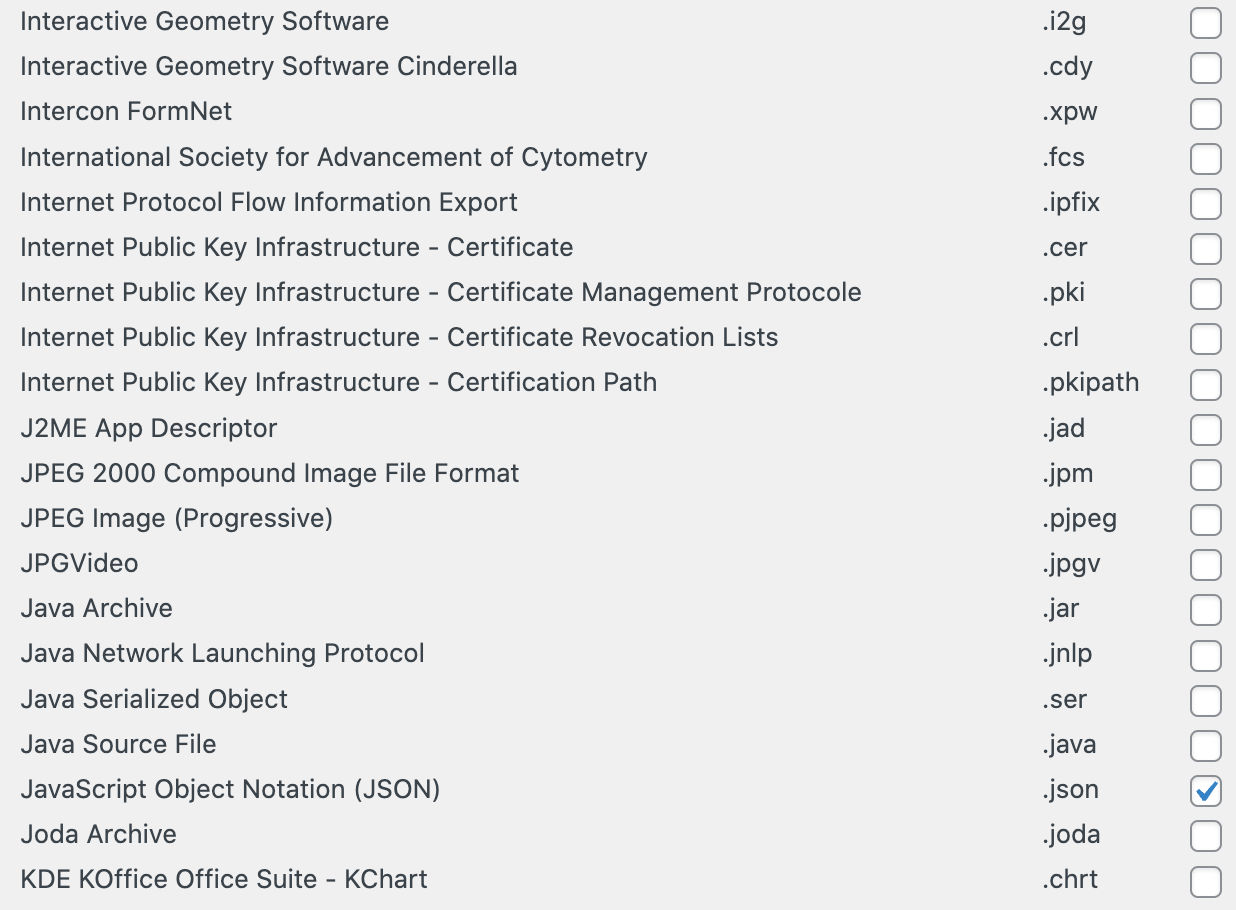
On the Extra File Types page, select the box next to “Check only file extensions” and “JavaScript Object Notation (JSON).”

And you’re done! Now, you can upload JSON files to your WP Media Library without getting a pesky error message.
Adding Lottie Functionality to Bricks
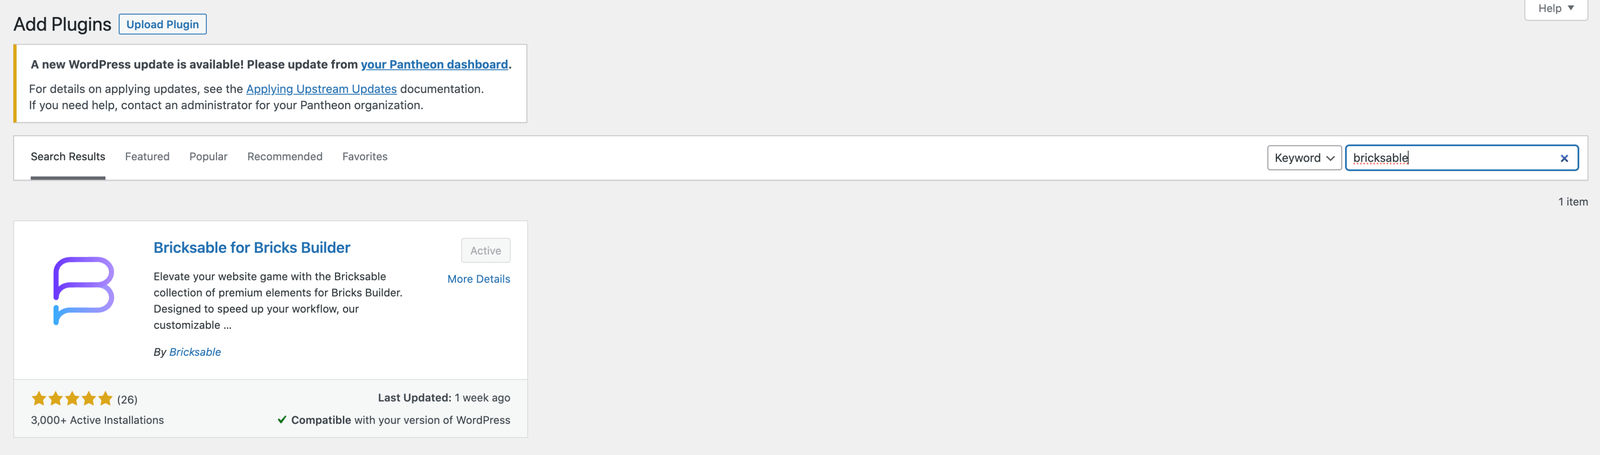
We still need to download another free plugin to add and edit a Lottie animation. Bricks doesn’t include a Lottie element by default, so download the Bricksable plugin. Once it's downloaded, click ACTIVATE.
Now, once you’re in the Brick builder, you’ll notice a new assortment of elements, including Lottie.
Using Lottie in Bricks
Once we’ve changed our WP environment, adding a Lottie to Bricks is easy!
Using a JSON File
Uploading the file is always your best option when working with Lottie or any type of animated design asset. You’ll run into fewer problems if there are server issues, and the animation will load faster. This is because the asset is on the front-end of your website and isn’t relying on a server request to access the design.
As long as you’ve enabled JSON uploads, you can use Lottie with Bricks.
First, click the “+” sign to add an element, then type “Lottie” in the search bar.
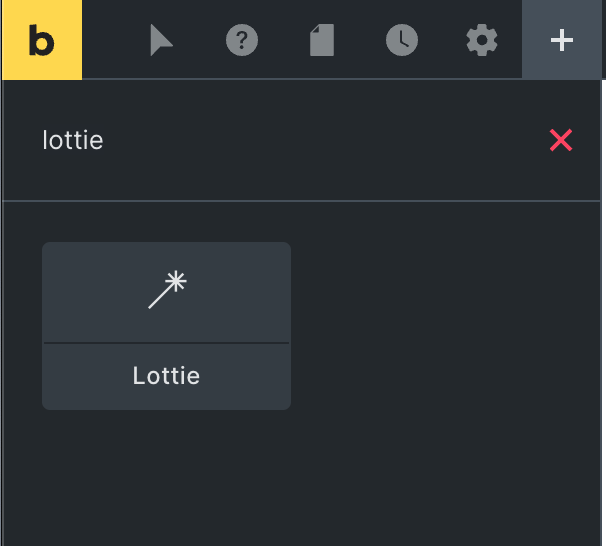
Once the Lottie element appears, drag it into the section you want to add an animation.
A placeholder animation will render; click the Lottie, and it will open up the editor.
In the left-hand toolbar, you’ll see the following options:
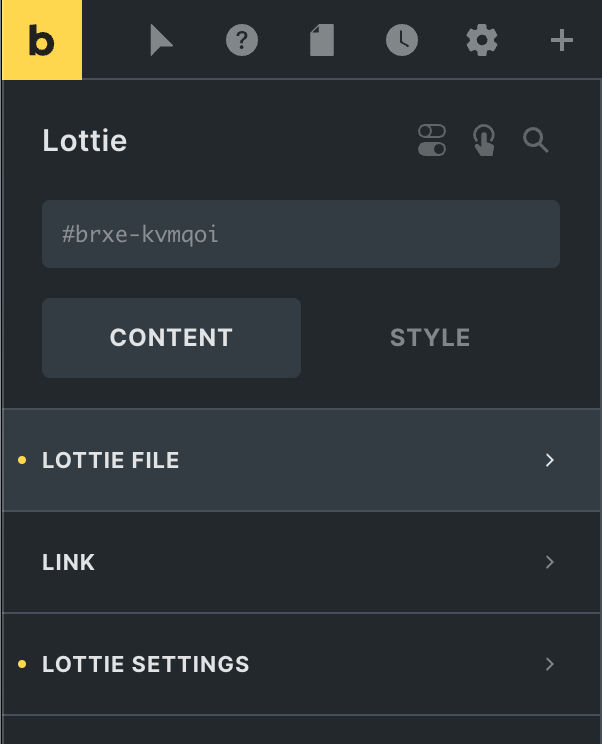
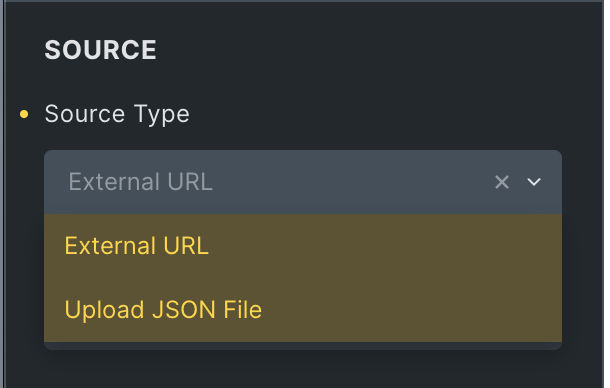
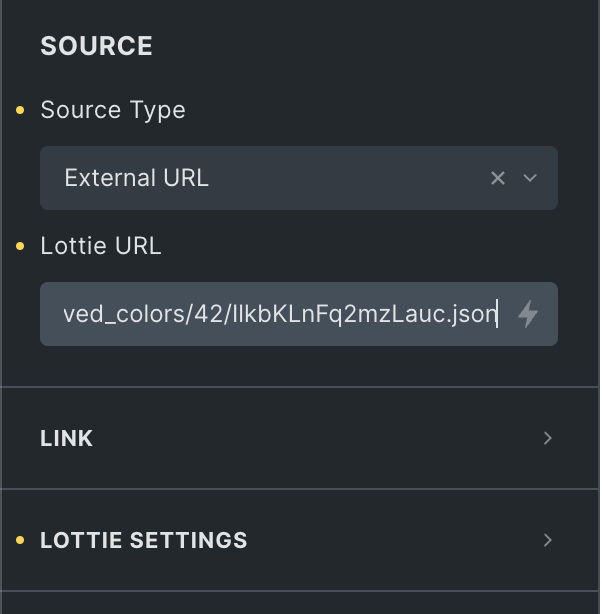
Expand the Lottie File option to choose where your animation will come from. Then click the dropdown under Source Type and select “Upload JSON File.”
Now, we can upload our Lottie into our media library or choose a design if you’ve already done so.
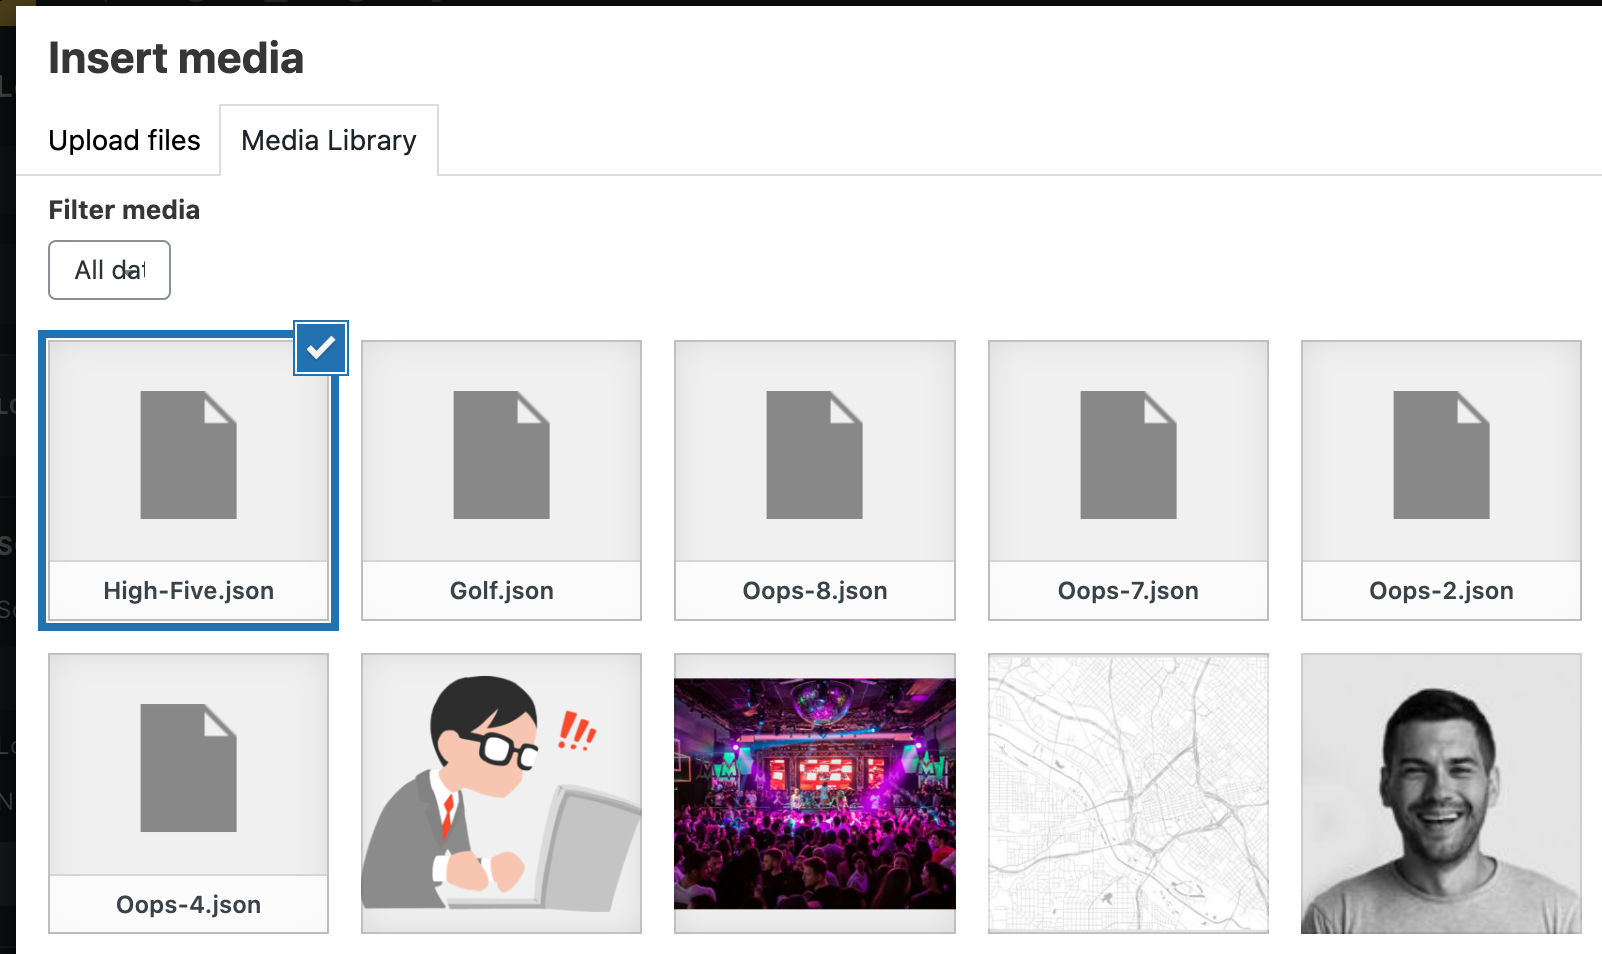
Once you choose the file and click INSERT, your Lottie will render.
Adding a Lottie with a URL
The other way to add a Lottie to Bricks is with a link to a server. This way is less efficient but also works well, and you get full functionality because Lottie animations are built with code.
Back in the Creattie editor, click the EMBED button. A pop-up will appear with the animation's code snippet. Copy just the SRC link.
Now, navigate to Bricks and go into the Lottie editor on the toolbar by clicking the animation or repeating the process above. In the Lottie File dropdown, select “External URL.” Paste in the URL, and your Lottie will render.
Customizations
Bricksable does a great job of allowing comprehensive editing options. You can make changes under the CONTENT or SYTLE tabs.
Lottie Content
Once your Lottie is on the page, expand the “Lottie Setting” dropdown under the CONTENT tab.
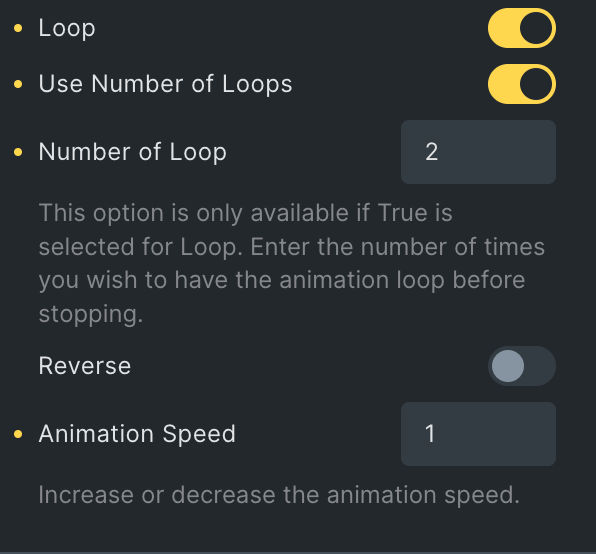
Here, you can change the following:
- Trigger – When the animation script begins running.
- Loop – An option to run the animation continuously.
- Number of Loops – Choose how many times you want the animation to play.
- Reverse – Run the animation script backward.
- Animation Speed – How fast the animation plays.
Editing the number of loops is an elegant yet rarely utilized feature on web builders. Typically, if you want your animation to run on a loop, it will play indefinitely. However, Bricks allows you to customize loops, which is an excellent addition.
Design Style
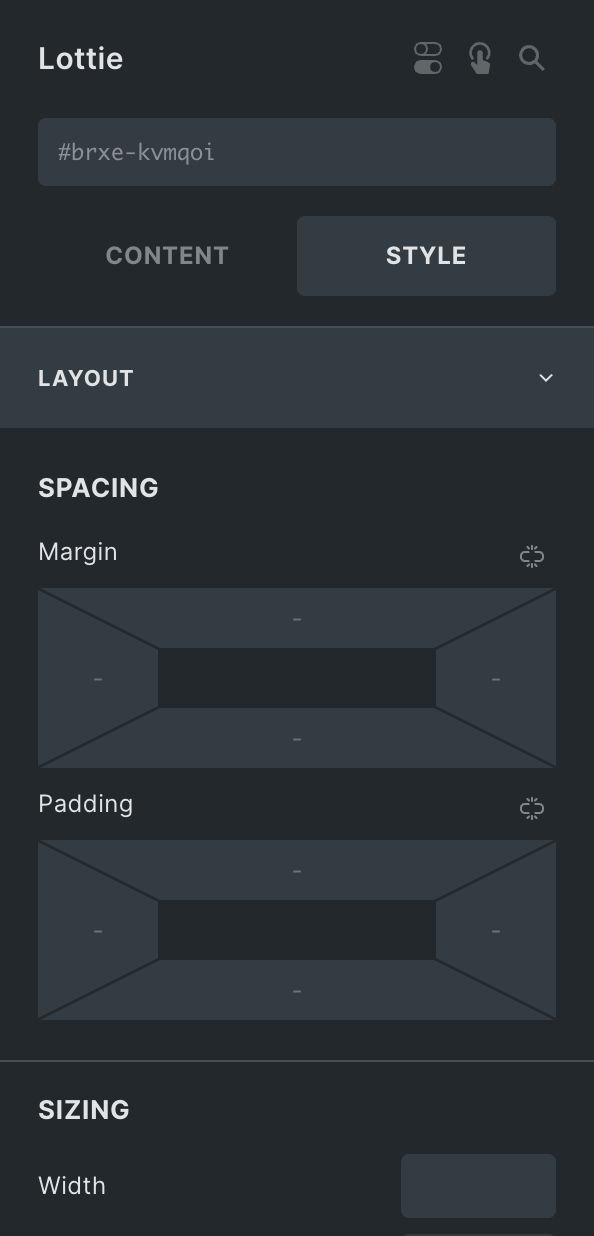
The DESIGN tab is the standard Bricks editor. You can change the layout, background color, border, and even add an overlay to change the appearance. In addition, Bricks allows advanced customizations like Transform, CSS transitions, and additional element attributes.
Most likely, you’ll want to change the size. Just expand the LAYOUT tab and enter a value into one of the options under SIZING.
Final Words
While Bricks isn’t the most Lottie-friendly builder on the market, with only a few adjustments, you are ready to add motion to your designs. Remember to allow JSON uploads and download the Bricksable plugin for Lotties to render on Bricks. Once your WP is set up, you have the complete functionality at your fingertips.
If you are ready to start using Lottie with Bricks, head over to Creattie and get started!